
IO wiring
Place a switch, a timer and a light on your map, and the IO tool is where you run wire between them, so the circuit is already built when the map boots. You click a wireable prefab to make it a node, click one output handle and one input handle to run a wire, and the panel checks each wire as you go.
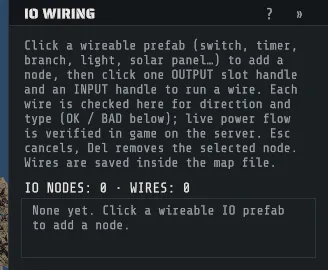
Pick IO Wiring on the tool rail. There is no default shortcut for it. The status bar then reads:
LMB an IO prefab to add a node · click a slot then another to wire · Esc cancels · Del removesWire a circuit
Section titled “Wire a circuit”- Place the prefabs you want to wire, and position them before you wire them.
- Click a wireable prefab: a switch, a button, a timer, a branch, a light, a solar panel, a generator. It becomes a node, listed as its id and its prefab name.
- Look at the handles that appear on the node. Inputs run up one side, outputs up the other.
- Click an output handle, then an input handle. That is one wire, and the click order is worked out for you, so picking them the other way round still makes a correctly oriented wire.
- Press Esc to abandon a half-made wire.
- Select a node and press Del to delete it. Its wires go with it, as one undo step.
A wire runs from an output to an input of the same IO type, and Creator will not create one that
does not. Each wire is listed under the selected node as OK or BAD with the reason, and the panel
carries a whole-map roll-up: IO NODES, WIRES, and how many of them are OK and BAD. A wire made by
the tool is valid when you make it, so a BAD row means something changed underneath it later.
Slot names
Section titled “Slot names”Creator ships the slot tables read out of the game’s own content: 164 IO prefabs with their real slot
names, IO types and handle positions. For those, the panel shows the names the game uses, under
in: and out:, and the handles sit where the game puts them.
Any other prefab that reads as an IO entity still works: it gets one generic power in and one
power out, and its handles are laid out on the sides of the object. You can wire it, you just do
not get its real slot names.
Per-node settings
Section titled “Per-node settings”Three settings ride on the node itself and are applied on the server with the wiring. They commit when you leave the field, and each is one undo step:
| Field | What it sets |
|---|---|
| Timer seconds | How long a timer stays on after it is triggered. |
| Branch amount | How much power an electrical branch takes for its branch output. |
| Counter target | The number a counter counts to. |
What the map stores, and how the server finds it
Section titled “What the map stores, and how the server finds it”The wiring is saved into your map as Creator’s own IO data, so it travels inside the .map with no
extra file. Applying it needs the server extension: see
Run your map on a server. Without it the prefabs still spawn,
and nothing is wired.
The server does not get the entity itself from the wiring data, because the server spawns your map’s prefab list on its own. It matches each node to a live entity by the prefab and the position, within 5 cm, and positions are rounded to the centimeter when you save so the match is stable. A node that matches nothing is reported in the server log by its id, prefab and position, and its wires are skipped. Nothing throws and the rest of the map loads.
Creator also refuses to save two IO nodes of the same prefab within the match distance, because the server could not tell them apart. The save stops with Save blocked. and the message names the two node ids, the prefab and the distance. Move one of them apart and save again.