Splat painting
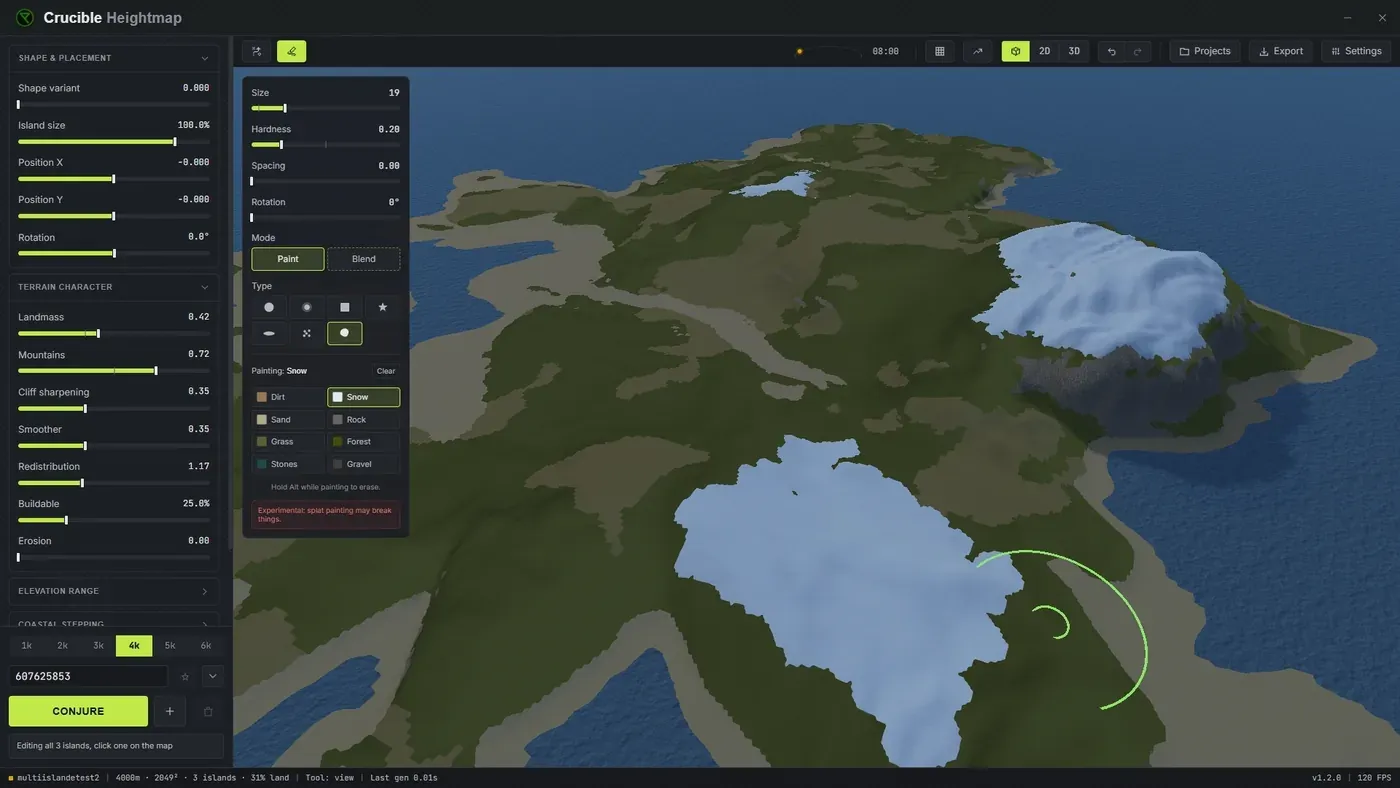
Splat painting lets you paint Rust’s ground textures directly onto your map: grass, forest floor, dirt, sand, rock, gravel, stones and snow. These textures (Rust calls them “splats”) are what the terrain surface actually looks like in game, and they ride along with your heightmap when you export for RustEdit. Toggle it with the Splat button in the toolbar or press V.
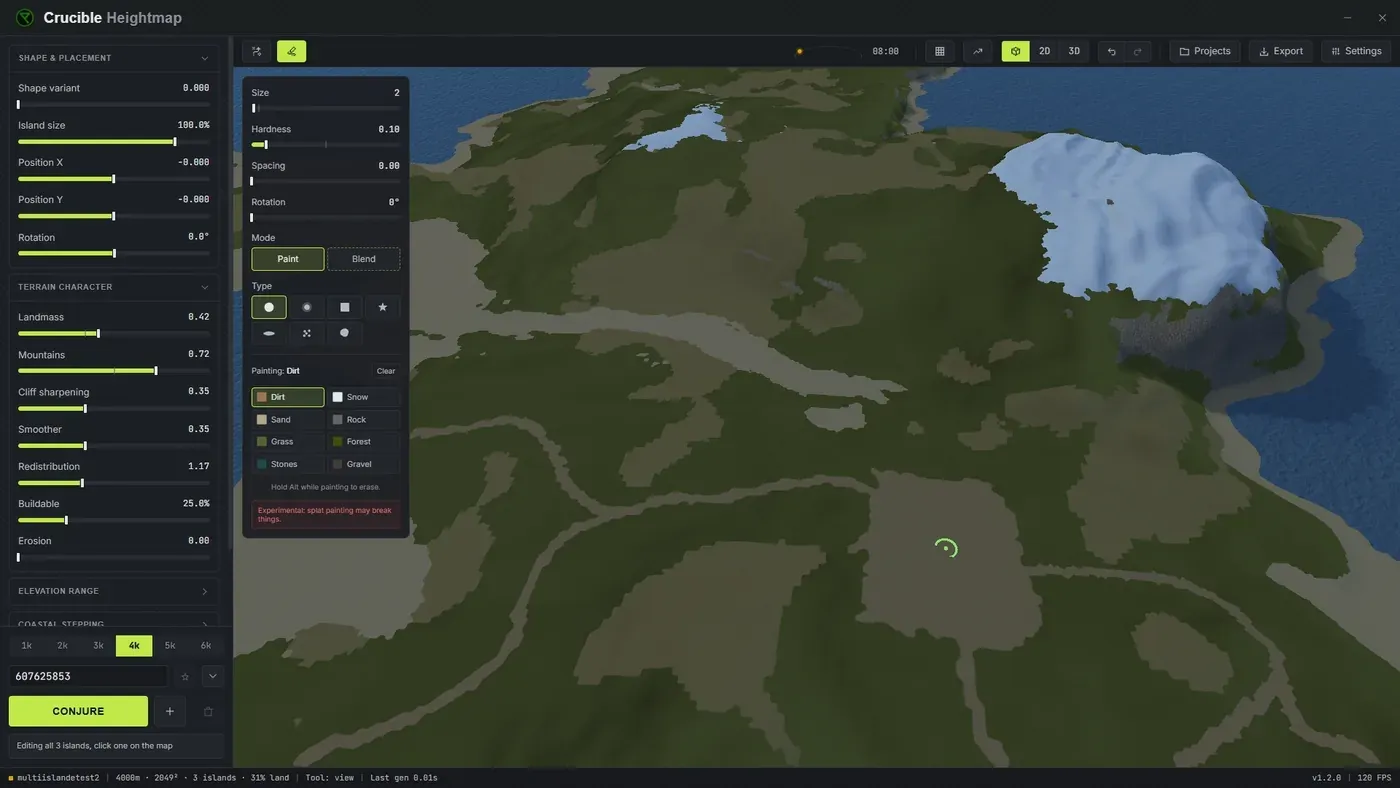
Crucible Heightmap also lays down a sensible base coat of textures automatically based on the terrain it generates, so even a map you never hand-paint exports with beaches on the shoreline, rock on the cliffs, snow on the peaks and grass on the lowlands. Painting just lets you take control where you want it.
What is a splat in Rust?
Section titled “What is a splat in Rust?”A splat is a ground texture painted onto the terrain surface. Rust blends up to eight of them across the map, and each one changes how that patch of ground looks and how footsteps sound on it. Splats are separate from the heightmap (the shape of the land) and separate from biomes (the climate region). When you make a custom Rust map you set all three: height, splats, and biome.
Crucible Heightmap does all three. This page is about the ground textures you paint by hand; the worldgen lays down a whole-map ground texture and the biomes to go with it, and both ride into your .map export.
What do the 8 Rust ground textures do?
Section titled “What do the 8 Rust ground textures do?”- Grass: the default temperate ground. This is the green field texture, and it is where Rust grows its grass clutter. Most flat, low and mid-elevation land is grass.
- Forest: the forest floor, a darker leaf-litter ground that sits under tree cover. Crucible scatters it in natural patches inside grass rather than as one solid block.
- Dirt: bare brown soil. Hand-paint it for worn, eroded or trodden ground; it is not placed in the automatic base coat.
- Sand: light beach and desert ground. It forms the shoreline ring around every island.
- Rock: exposed stone. It belongs on true cliff faces and steep mountainsides, not on gentle slopes.
- Gravel: small loose gravel. In vanilla Rust this is the texture roads and trails are laid on, so it is the go-to for hand-painting paths, lots and roadways.
- Stones: the stony, pebbly ground Rust uses for river beds and stream bottoms. It renders blue on the in-game map, so painted stones read as waterways at a glance.
- Snow: white snowy ground, the texture for mountain peaks and cold, snowy areas. This is the ground only. The snow-covered look on grass, trees and plants comes from the Arctic biome (set in RustEdit), not from this splat.
Footsteps sound different on each splat in game (snow crunches, gravel crunches differently, sand is soft), so the texture you paint also changes the audio underfoot, not just the look.
How do you paint splats?
Section titled “How do you paint splats?”- Press V (or click Splat) to open the paint panel.
- Pick the ground texture you want from the labelled swatches.
- Paint directly on the 3D map. The texture appears live as you go.
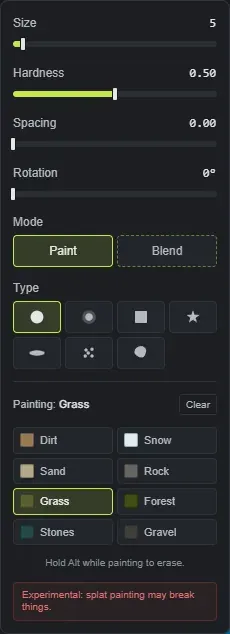
Controls in the paint panel:
- Size: how wide the brush is. It goes down to a single cell for fine detail and up for broad coverage.
- Hardness: how much the brush blends into what is already there. A high hardness lays down a clean, solid patch. A lower hardness keeps a solid core but breaks the edge into organic chunks that mix the new texture into the surface underneath, the same chunky blending the Blend mode does, so the lower you set it the more the splat fingers into its surroundings. Edges still render crisp in the editor (no blurry band, the same clean look as the auto base coat and the Blend brush); the soft cross-fade is added automatically on export, so your finished
.mapblends gently in game. Splats are experimental: how cleanly the export blend carries through the RustEdit (World Creator) import is still being refined. - Spacing: how a stroke is laid down. At 0 it paints one continuous, smooth line; turn it up to stamp evenly spaced dabs along the stroke, with clearly separated dabs near the top of the slider.
- Rotation: turns the brush footprint in degrees. It is most visible on the square, star and streak types.
- Type: the footprint of the brush (see below).
- Mode: Paint lays down the texture you picked; Blend smudges the textures already on the map together instead of adding a new one (see below).
The on-canvas cursor shows the selected type at the true painted size, with an inner ring marking the hard core so you can see how much of the footprint is soft falloff.
Handy keys while the panel is open:
- Tab / Shift + Tab cycle through the eight textures.
- Alt held while painting erases back to the auto base coat.
[and]shrink and grow the brush.- Escape closes the paint panel.
- You can bind a Swap to blend key in Settings to flip the brush between your current type and Blend mode.
- You can bind a Clear splat layer key in Settings.
What do the brush types do?
Section titled “What do the brush types do?”Pick a type in the paint panel to change the brush footprint:
- Round: the default soft circle, good for almost everything.
- Soft: an always-feathered circle for gentle blends.
- Square: a square footprint for blocky areas and lot lines (use Rotation to angle it).
- Scatter: drops a few separate random blobs each stamp, for broken-up, dappled coverage.
- Organic: stamps a natural, irregular splotch with a wobbly edge, ideal for forest-floor and dirt patches. Every stamp comes out a different shape.
- Star, Streak: stylized footprints for breaking up uniform areas and adding variation. Rotation turns both.
Blending textures together
Section titled “Blending textures together”Switch the panel to Blend mode to mix the textures already on the map instead of painting a new one. Paint over a seam where two textures meet and Blend smudges them together, dragging the edge a different random way each stroke, for a natural, hand-worked transition. Hardness sets how deep the blend reaches: low just softens the seam, high mixes the two textures further into each other. Switch back to Paint to lay down your active texture again. You can also bind a Swap to blend key to flip straight between your current type and Blend.
How does the automatic base coat work?
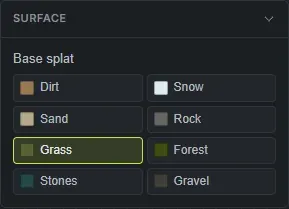
Section titled “How does the automatic base coat work?”Every generated island gets a base layer of textures derived from its own terrain, so it looks right before you touch it: sandy beaches at the shoreline, a sandy ocean floor, snow caps on the highest peaks, forest scattered through the grass in natural patches, and grass everywhere else. Rock appears only on the true cliff faces (the steeper and taller the face, the more rock shows). Dirt and Stones are not placed automatically, so they are yours to hand-paint. Each conjured map gets its own texture layout, so two different seeds will not share the same forest and rock pattern.
This automatic base coat is what shows up in the Map PNG and in your exported splats (the .map file and the World Creator set). In the live 3D view, each island is tinted by its single base surface rather than the full patchy base coat, so the streaky rock and forest patches are clearest in the exported Map PNG.
You can set a base surface per island in the Surface section (for example make a whole island read as desert sand or arctic snow), and the last surface you pick becomes the default for the next island you add.
When you paint, your strokes override and blend with the base coat. Anywhere you do not paint, the auto base shows through, so a quick map can be all-automatic and a detailed one can be hand-finished.
Do painted splats stick to islands?
Section titled “Do painted splats stick to islands?”Yes. If you move, scale or rotate an island, its painted textures follow it, and each island keeps its own paint. And when you save an island as a seed file, the painted textures travel with it, so dropping that island onto another map brings its look along.
Seeing the ocean floor
Section titled “Seeing the ocean floor”The ocean surface is a separate water layer you can hide. Press Y (the Water layer key, rebindable in Settings under Keybinds) to drop the waterline and inspect the sandy seabed underneath.
How do splats work with Rust biomes?
Section titled “How do splats work with Rust biomes?”Splats and biomes are two different layers, and you set both here:
- A splat is the ground texture (the eight surfaces above). It is what you paint on this page.
- A biome is the climate region: Rust has Arid, Temperate, Tundra, Arctic and Jungle. The biome controls grass colour and density, the ambient lighting and fog, the weather, and which animals and clutter spawn.
Biomes come from the worldgen, which derives them from your terrain, and you can override them with the biome brush. Both layers export together in your .map.
This is why snow ground alone never looks like snow: paint the Snow splat in a Temperate biome and you get white dirt in a green world. The snowed-over look on trees, rocks and grass comes from the Arctic biome sitting on top of it.
Exporting your splats to RustEdit
Section titled “Exporting your splats to RustEdit”When you are done painting, you have two ways to carry your splats into RustEdit. The quickest is to export a MAP File, which opens directly in RustEdit with your terrain and splats already in place (see export a Rust .map file). Or turn on XML Splat + Heightmap in the export panel for the World Creator route: Crucible writes the heightmap, the splat maps, and a .xml config file named after your project, and you import that .xml with RustEdit’s World Creator importer. For the full picture-by-picture import, follow import a heightmap and splats into RustEdit.
- Start with the automatic base coat and only paint the areas you care about. It saves a lot of work.
- Lower the hardness to mix a texture into its surroundings as you paint (the edge breaks into chunks); raise it for a clean, solid patch. Edges look crisp either way; the soft cross-fade is added on export. The Blend mode mixes two textures already on the map together where they meet.
- Use Gravel or Dirt for roads or trails, as Rust does.
- Reserve Rock for real cliff faces; on gentle slopes it looks out of place. The base coat already does this for you.
- Hold Space while painting to orbit the camera, then release to keep going.
- Paint strokes are undoable with Ctrl + Z.